Service light reset procedures
|
WARNING: Resetting your service light is not a remedy for servicing your vehicle. Only perform these procedures after an oil change/vehicle service and obey your manufacturer's suggested service intervals. Procedures are available for the following manufacturers/models:
Audi A3 (1996-1999), A4 (1994-2001), A6 (1996-2000) If the service is due on these vehicles, when the key is turned to position 2, one of the dashboard displays will show "Service INSP", "INSP1" or "INSP2" for Fixed interval services, and "SERVICE OEL / OIL" for the Oil Service interval.The oil service reset procedure is as follows:
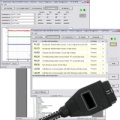
Audi A2 (2000-2005), A3 (2000-2003), A6 2000 to 2004) These models support both Fixed Interval and Flexible Interval (Long Life) servicing.If your car is programmed for Flexible Interval servicing, you will need a diagnostic tool to reset the interval. We recommend the Ross-Tech VCDS package for this:
For Fixed Interval servicing, you can use the following procedure:
Audi A3 (2003-2009) These models support both Fixed Interval and Flexible Interval (Long Life) servicing.If your car is programmed for Flexible Interval servicing, you will need a diagnostic tool to reset the interval. We recommend the Ross-Tech VCDS package for this:
For Fixed Interval servicing, you can use the following procedure:
Audi A4 (2001-2007) These models support both Fixed Interval and Flexible Interval (Long Life) servicing.If your car is programmed for Flexible Interval servicing, you will need a diagnostic tool to reset the interval. We recommend the Ross-Tech VCDS package for this:
For Fixed Interval servicing, you can use the following procedure: Below and to the right of the speedometer are three buttons - the right-hand button of these three is usually labelled "0,0", and the centre button labelled with a spanner/wrench symbol.
Audi A8 (1994-2004) These models support both Fixed Interval and Flexible Interval (Long Life) servicing.If your car is programmed for Flexible Interval servicing, you will need a diagnostic tool to reset the interval. We recommend the Ross-Tech VCDS package for this:
For Fixed Interval servicing, you can use the following procedure: Towards the bottom-right corner of the instrument cluster there should be a button labelled "0,0"
Audi TT (1999-2006) These models support both Fixed Interval and Flexible Interval (Long Life) servicing.If your car is programmed for Flexible Interval servicing, you will need a diagnostic tool to reset the interval. We recommend the Ross-Tech VCDS package for this:
For Fixed Interval servicing, you can use the following procedure:
Note: that if the "Reset" or "Re" does not flash, then you have not met the minimum consumption level and cannot reset *Note: On vehicles with "High" cluster, you will also see the amount of fuel (in litres) remaining until next service Citroen - most models
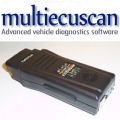
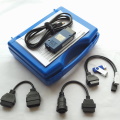
Fiat 500 (2007-present), Panda (2004-present), Punto (2003-2006), Grande Punto (2005-2010), Punto Evo (2010-present) On models fitted with the computerised menu system, you can check the number of miles until the next service by choosing Menu > Service.To reset the service light, you will need to use a diagnostic tool. We recommend the excellent MultiECUScan package for this:
Renault Clio (2005-present), Espace 4 (2003-present), Laguna II (2001-2007), Megane II (2002-2009), Scenic II (2003-2009), Twingo (2007-present), Vel Satis (2002-2009)
Vauxhall Agila B (2008 onwards)
Oil Service Reset:
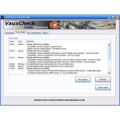
Vauxhall - Most passenger cars 1999 onwards
Renault Trafic (2001-present), Vauxhall Movano (2007- present), Vivaro (2007-present)
Volkswagen (with digital Odomoter) The code on the mileage display when you start the car will read "IN01", "IN02" or similar. To remove this, use the following procedure (this should work on any VW with a digital odometer):
Volvo 1999-2000 - S / V / C70 Models
We are continuing to research these procedures and will add to or update this list as further information is found. |


-
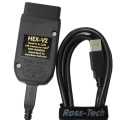
Ross-Tech VCDS HEX-V2 USB Package (3 VIN)
£ 225.00 -

MultiECUScan Diagnostic Package (USB)
£ 129.95 -

Gendan EngineCheck Pro USB package
£ 99.95 -

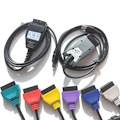
VW Audi USB KKL Diagnostic Interface Cable
£ 19.94 -
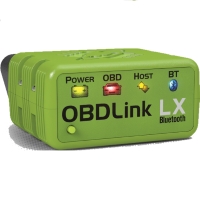
OBDLink LX EOBD OBD-II Bluetooth Interface
£ 94.96 -

MultiECUScan Package (CAN cars only)
£ 112.94 -
Ross-Tech VCDS HEX-V2 USB Package (10 VIN)
£ 299.00 -

USB Engine package for 2001+ petrol, 2004+ diesel
£ 69.95 -
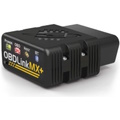
OBDLink MX+ EOBD OBD-II Bluetooth Interface
£ 129.95 -
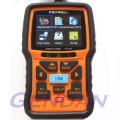
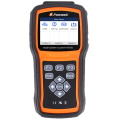
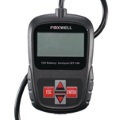
Foxwell NT301 Diagnostic Scan Tool
£ 69.00 -

VauxCheck Software with vLinker FS USB interface
£ 64.94 -
Ross-Tech VCDS HEX-V2 USB Package (Unlimited VIN)
£ 499.00 -
Foxwell NT530+ Full Systems Scan Tool - BMW & Mini
£ 164.00 -
MultiECUScan Multiplex Package
£ 360.00 -
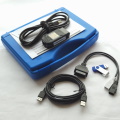
Ross-Tech VCDS HEX-V2 Enth. Plus Bundle (10 VIN)
£ 319.00 -
MultiECUScan Coloured Adaptor Cables
£ 31.94 -
Foxwell NT530+ Full Systems Scanner - Porsche
£ 164.00 -
Opel-Scanner for Vauxhall and Opel cars
£ 199.00 -
EngineCheck Pro Diagnostics Software Download
£ 57.14 -
Ross-Tech VCDS HEX-NET Pro Plus Bundle (Unlimited)
£ 649.00 -
VauxCheck Diagnostics Software download
£ 30.59 -
Foxwell NT530+ Full Systems - Peugeot/Citroën
£ 164.00 -
Ross-Tech VCDS HEX-NET Interface Package (10 VIN)
£ 430.00 -

FiCOM Advanced Fiat & Alfa Diagnostics Package
£ 395.00 -
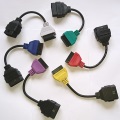
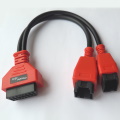
OBD-II / EOBD Extension Cable - 20cm
£ 12.50 -
Foxwell NT530+ Full Systems Tool - Hyundai / Kia
£ 164.00 -

OBDLink CX Bluetooth Interface for BimmerCode
£ 79.96 -
MaxiECU for Vauxhall and Opel cars - Wireless
£ 140.00 -
Foxwell NT530+ Full Systems Tool - FIAT / Alfa
£ 164.00 -
EngineCheck Diagnostics Software Download
£ 30.59 -
Ross-Tech VCDS HEX-V2 USB 3-VIN Package (No Case)
£ 222.00 -
GS-911 USB Enthusiast Package 16-pin
£ 215.00 -
Ross-Tech VCDS HEX-V2 USB Home Plus Bundle (3 VIN)
£ 245.00 -
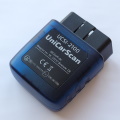
UniCarScan UCSI-2100 Bluetooth Interface
£ 51.50 -
Foxwell NT530+ Full Systems Scan Tool - VAG cars
£ 164.00 -
OBD-II / EOBD Extension Cable - 3 metre
£ 14.95 -
Foxwell NT530+ Full Systems - Jaguar Land Rover
£ 164.00 -
EngineCheck Pro Diagnostics Software Upgrade
£ 29.57 -
Foxwell BT100 12 Volt Battery Analyser
£ 44.95 -
Foxwell NT530+ Full Systems Scan Tool - Honda Cars
£ 164.00 -
Security Gateway bypass adaptor for FCA vehicles
£ 24.95 -

MultiECUScan Package (Non-CAN cars only)
£ 85.00 -

Foxwell NT680 PLUS ALL Systems Scan Tool
£ 450.00 -
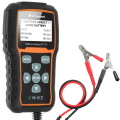
Foxwell BT715 12 / 24 Volt Battery Analyser
£ 85.00 -
Foxwell NT530+ Full Systems - Mercedes & Smart
£ 164.00 -
MultiECUScan Hardware Only Bundle
£ 80.00 -
Ross-Tech VCDS HEX-NET Package (Unlimited VIN)
£ 625.00 -
Foxwell NT530+ Full Systems Tool - Vauxhall / Opel
£ 164.00 -

10-pin Adapter lead for GS911 with 16-pin plug
£ 19.94
