| Home | Product FAQs | KKL interface - Windows 98/ME drivers |
"KKL" VAG-COM Compatible Interface:
Windows 98/ME USB Driver Installation
Interface setup is very straightforward, and comprises 3 stages:
- Download the USB Drivers and the VCDS-Lite software
- Install the USB drivers for the interface
- Install and setup the VCDS-Lite software
Stage 1: Download the USB Drivers and the VCDS-Lite software
To get your interface up and running, you need to install software device drivers for the USB interface, and the VCDS-Lite software itself to connect to the car. You can download them from the following locations:
USB Device Drivers: www.gendan.co.uk/download/vagusb98.exe
VCDS-Lite: www.ross-tech.com/vcds-lite/download/
Save both of these in a folder on your computer. You will need to come back to it to run the VCDS-Lite installer later.
Stage 2: Install the USB drivers for the interface
Note: screenshots shown from Windows 98 - Windows Millennium Edition may look slightly different, but the process will be the same.
If you are on Windows 2000 or later, you need different drivers - please see the guide that came with your interface cable.
-
Important: Do NOT plug the USB interface into your PC yet - you
need to install the software drivers first!
-
Browse to the location where you downloaded the files, and double-click on the
vagusb98.exe file to begin the driver installation process. You should
then see the following screen:
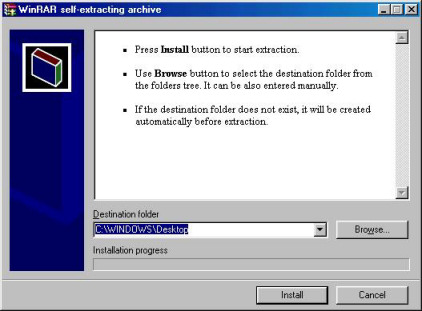
-
Click the "Install" button, and the program will extract the
device driver files to a folder on your desktop called "VAG USB Drivers".
While doing so a progress bar will appear as below, then when it has completed the program will close:
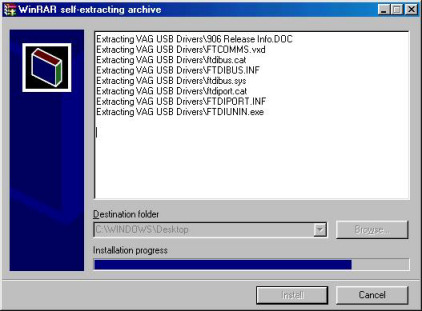
-
When the extraction has finished, and the program has closed, plug the USB
interface cable in to to your computer. This should start the "Add New
Hardware Wizard". When it does so, click Next
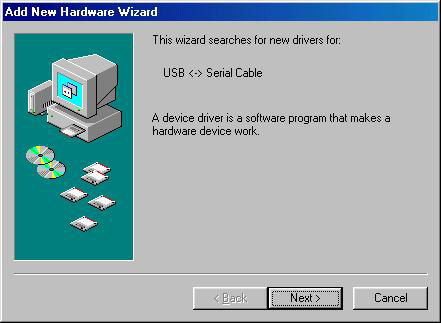
-
Select "Search for the best driver for your device (Recommended)" as shown below
and then click "Next"
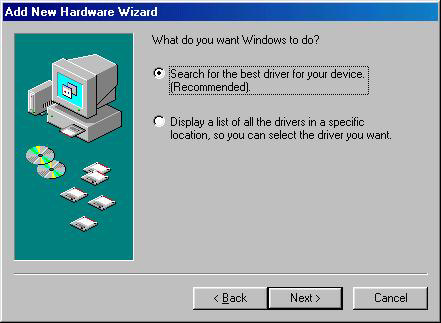
-
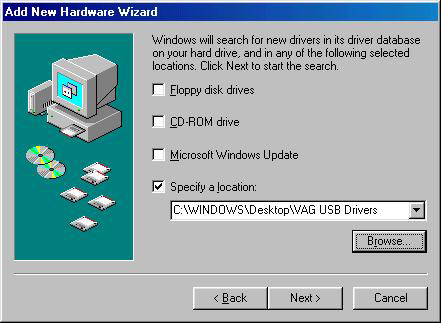
Make sure only "Specify a location:" is ticked, then click 'Browse' and browse to the
C:\Windows\Desktop\VAG USB Drivers folder. Then click Next
-
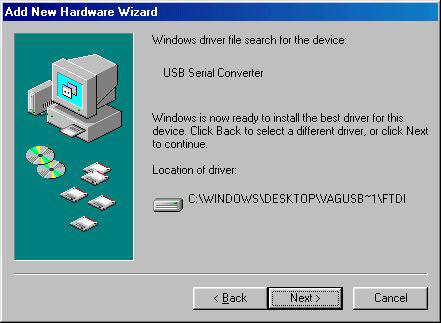
Windows will then search the folder for a suitable driver, and should come back with
the message as below. Click Next...
-
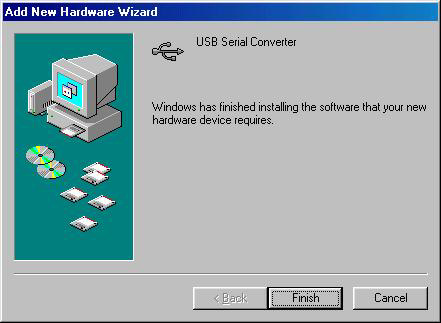
Windows will copy the required files to the computer - this can take a little while on
older computers. It will then display a message indicating the installation is complete.
Click "Finish"
PLEASE NOTE: In some cases, Windows may then go through the driver installation process a second time, to install a secondary component of the interface, during which time you may see this:
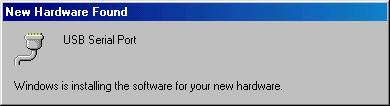
If this happens, wait until the process completes.
The device is now ready for use.
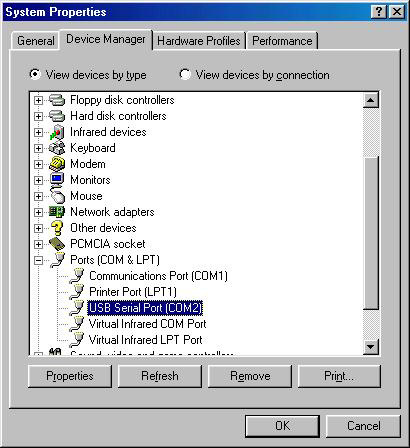
Checking the driver installation
To confirm that the drivers are correctly installed you need to open the Windows Device Manager. To do this:-
Click on Start > Settings > Control Panel
-
Double-click on System
(if "System" does not appear on the list, there should be a link on the left-hand-side marked "If you don't see an option you are looking for, view all Control Panel options". Click on that link. You should then be able to see System).
-
When the System Properties window opens, Select the Device Manager tab
-
Click the + symbol next to the Ports (COM & LPT) heading
-
The device should appear with the label USB Serial Port (COMx)
Stage 3: Install and setup the VCDS-Lite software
-
Double-click on the VCDS-Lite-x.x-Installer.exe file you downloaded from the
Ross-Tech website, and follow the installation procedure through until it completes.
-
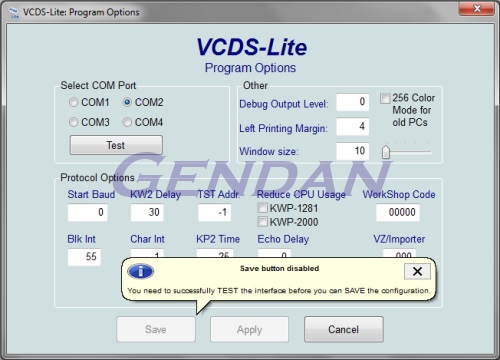
The first time you run VCDS-Lite after installation, click on the Options button.
You should then see this screen:
-
Under "Select COM Port", choose the COM port number you noted down from the
Device Manager, then click Test.
If the test reports back ok, then click Save.
- VAG-COM is now ready to use.
