| Home | Product FAQs | ELM Chipset Interfaces: Windows 98/ME |
ELM Chipset Interfaces:
Windows 98/ME USB Driver Installation
Interface setup is very straightforward, and comprises 3 stages:
- Download and install the EngineCheck diagnostics software
- Install the drivers for the interface
- Activate the EngineCheck software
Stage 1: Download and install EngineCheck
Follow the download instructions emailed to you for the EngineCheck software - if you have purchased an ELM interface from us but not received this email, please email us at support@enginecheck.co.uk
- Once you have downloaded the EngineCheck setup file, double-click it to begin the setup.
- Follow the onscreen instructions to complete the setup.
- Once the setup has finished, please continue to Stage 2.
Stage 2: Setup the drivers
Note: screenshots shown from Windows Millennium Edition (WinME) - Windows 98 may look slightly different, but the process will be the same.
-
Plug the USB cable (with interface attached) to a spare USB port on your PC. This will launch the
"Windows Add New Hardware Wizard."

-
Select "Specify the location of the driver (Advanced)" as shown below and then click "Next".
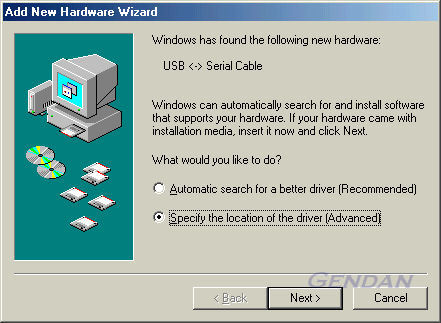
-
Select "Search for the best driver for your device", then make sure only "Specify a location:"
is ticked, and click 'Browse'.
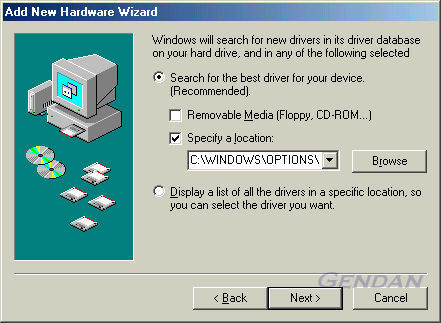
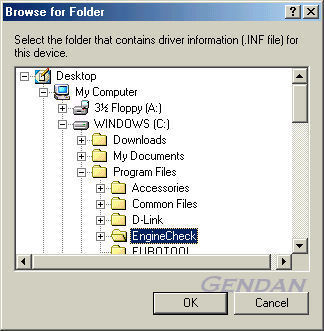
Locate the following folder: C:\Program Files\EngineCheck and click OK
(If you have EngineCheck Pro or VauxCheck, locate C:\Program Files\EngineCheck Pro or C:\Program Files\VauxCheck respectively)
C:\Program Files\EngineCheck should now appear in the location box. Click Next
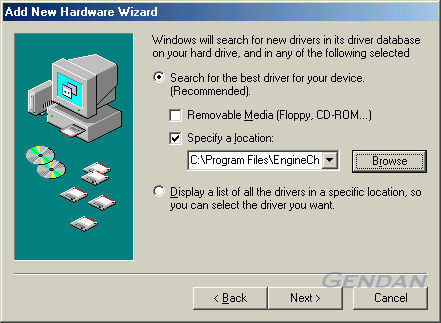
-
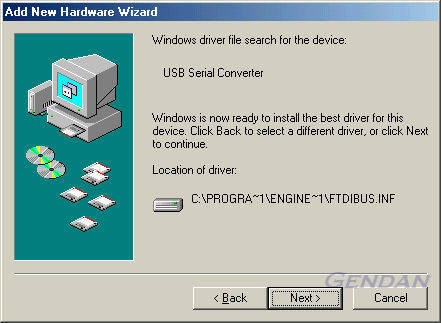
Windows will then search the folder for a suitable driver, and should come back with
the message as below. Click Next...
-
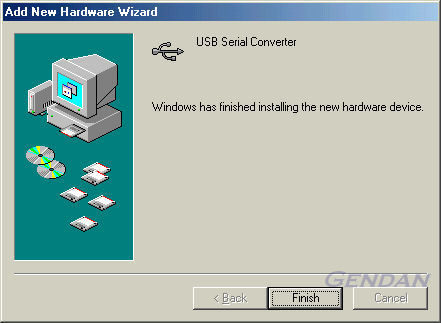
Windows will copy the required files to the computer - this can take a little while on
older computers. It will then display a message indicating the installation is complete.
Click "Finish".
The device is now ready for use.
PLEASE NOTE: In some cases, Windows may then go through the driver installation process a second time, to install a secondary component of the interface. If this happens, just repeat the process until it completes.
Checking the driver installation
To confirm that the drivers are correctly installed you need to open the Windows Device Manager. To do this:
- Click on Start > Settings > Control Panel
- Double-click on "System"
(if "System" does not appear on the list, there should be a link on the left-hand-side marked "If you don't see an option you are looking for, view all Control Panel options".- When the System Properties window opens, Select the "Device Manager" tab
Click on that link. You should then be able to see System).
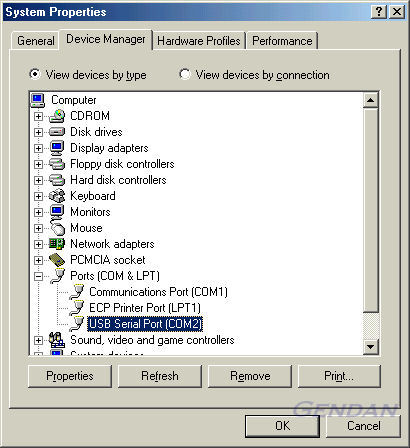
- Click the + symbol next to the Ports (COM & LPT) heading
- The device should appear with the label "USB Serial Port (COMx)"
Please make a note of the number shown after the word COM - if EngineCheck is not able to locate your interface automatically, this will be the COM port number you will need to specify in the software.
Stage 3: Activate the software
The first time you run the software, you will be required to enter your activation details - these details will be in your welcome email.
Double click the EngineCheck icon, or select:Start > Programs > EngineCheck > EngineCheck...from the Windows Start menu. |
|
|
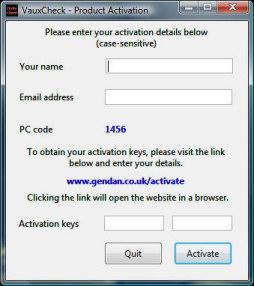
- The activation window will appear, and will show you a unique "PC code" number
generated by your PC (as illustrated) - Go to www.gendan.co.uk/activate and enter the details from the email, and your PC code. Your activation keys will then be emailed to you.
(If you do not receive this email within a few hours, please contact us on 01792 588002)
- Enter your details and click ActivatePLEASE NOTE: the activation details are case-sensitive, so must be entered exactly as shown on the activation email. |
|
Information on using the software can be found in the Quick Start Guide installed on your PC.
